Create a New File Asset
How To: Create a New File Asset
Common "file" asset types are: .pdf, .doc, .docx, .xls, .xlsx, .ppt, .pptx, .txt, .zip
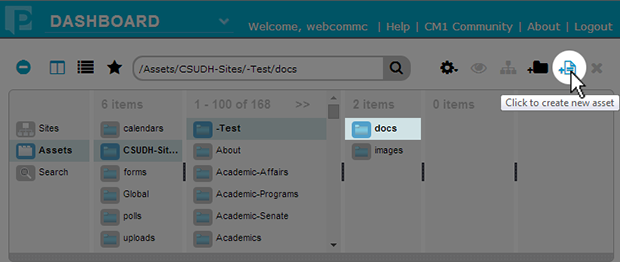
- Select the asset folder (by single-clicking) where the new asset will reside.
File assets are typically stored in the "docs" folder, as shown in the following example:
- Click the "Create New Asset" icon
 in the Finder Toolbar.
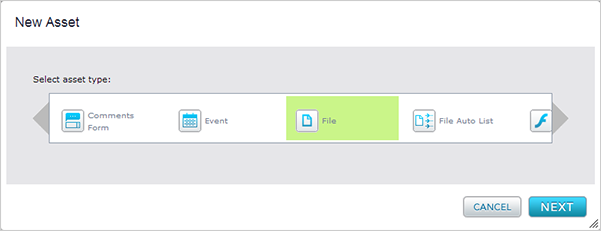
(Hovering over the icon displays the tool tip: "Click to create new asset".) - The following New Asset dialog box should open:

- Select File (use arrows to scroll) and click the NEXT button. The following screen appears in the Editor View area.

- In the Link text: field, enter a title for the file.
- Under File:, click Browse…, locate and select the file. Click Open to upload the file to CM1.
(IMPORTANT: Please use the University Naming Standard when naming web files and folders.) - Click the SAVE button
 .
.
(It may take a few minutes to process. Avoiding clicking the SAVE button multiple times.) - Contributors can click the SUBMIT button to submit the asset for approval.
Editors should publish the asset immediately by selecting "Publishing > Publish" in the Editor View menu, unless the file should remain hidden from search engines until a later publish time.
(IMPORTANT: The asset must be published before pages that contain links to the asset are published. Otherwise, links to the asset will not be active.)