Create a New Image Asset
How To: Create a New Image Asset
Common "image" asset types are: .jpeg, .jpg, .png, .gif
- Select the asset folder (by single-clicking) where the new asset will reside.
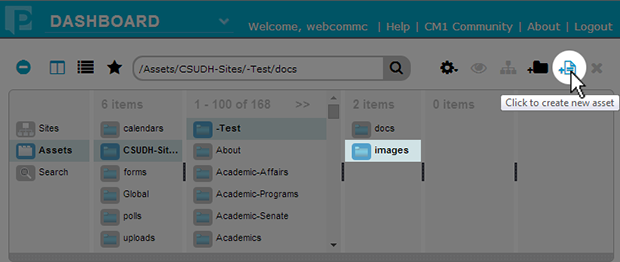
File assets are typically stored in the "images" folder, as shown in the following example:
- Click the "Create New Asset" icon
 in the Finder Toolbar.
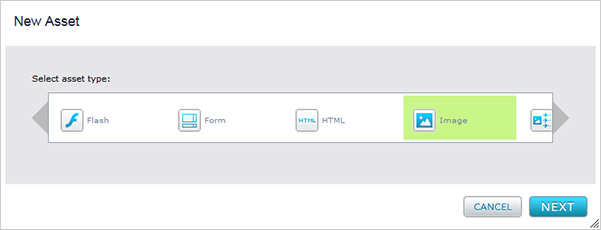
(Hovering over the icon displays the tool tip: "Click to create new asset".) - The following New Asset dialog box should open:

- Select Image (use arrows to scroll) and click the NEXT button. The following screen appears in the Editor View area.

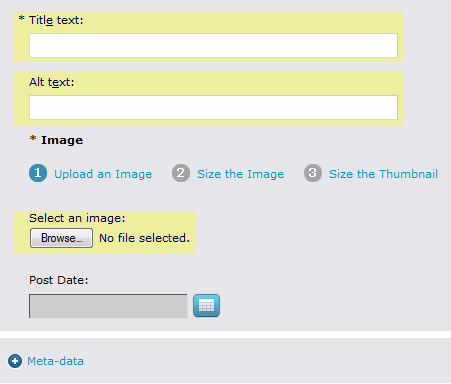
- In the Title text: field, enter a title for the image.
- In the Alt text: field, enter a description of the image.
(IMPORTANT: This is a required field for Section 508 compliance!) - Under Select an image:, click Browse…, locate and select the image file. Click Open to upload the image to CM1. A preview of the uploaded image is displayed. Do not alter the Width, Height, or Constrain proportions options.
(IMPORTANT: Please use the University Naming Standard when naming web files and folders.) - Click the SAVE button
 .
.
(It may take a few minutes to process. Avoiding clicking the SAVE button multiple times.) - Contributors can click the SUBMIT button to submit the asset for approval.
Editors can click the CLOSE button or publish the asset immediately by selecting "Publishing > Publish" in the Editor View menu.